


Confirm the Brim Construction Before Sampling
Brim preparation combines the insert and fabric covers into the shape that extends from the crown. For headwear brands, importers and distributors, its outline, firmness and stitching affect both appearance and how the finished cap handles.
We coordinate these details against the agreed sample and specification. Brim length, width, curvature, underside colour and stitch layout should be confirmed together. A reference photograph helps communicate the look, but it cannot establish insert flexibility or the feel of the finished edge.
For OEM orders, provide a physical reference where these characteristics are important. Identify which details must match and which can be reviewed during sampling.
Match the Insert to the Intended Shape
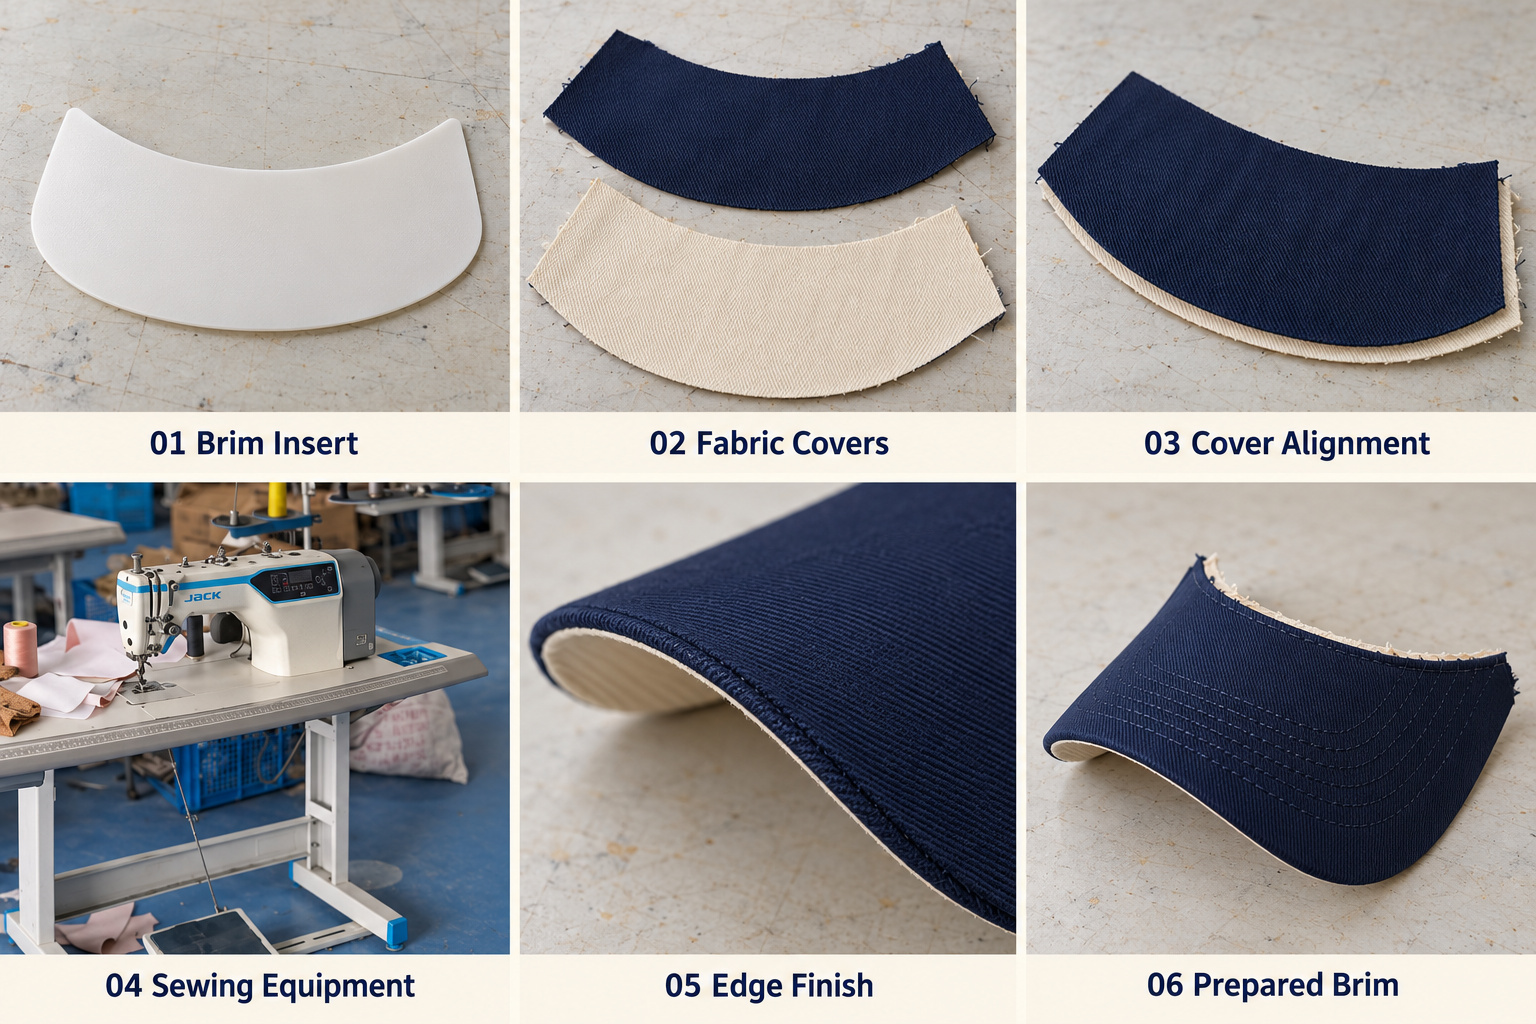
The insert needs to suit the brim outline and intended firmness. A flatter profile and a pronounced curve may require different preparation, even when their fabric covers look similar.
Thickness alone does not define how a brim behaves. Insert material, flexibility and shape also matter. Substitutions should be reviewed through a sample because they can change handling, edge appearance and the finished profile.
Any washability or performance requirement needs separate confirmation. It should not be assumed from the insert’s appearance. The agreed cap structure and brim configuration provides the starting reference for this review.
 Fit the Fabric Covers Around the Insert
Upper and lower covers should follow the cutting pattern and leave the allowance required for construction. Their orientation matters when the fabric has a directional weave, print or visible texture.
During preparation, the covers need to sit evenly around the insert. Insufficient fabric can create pulling, while excess material may gather into wrinkles. The edge seam should follow the intended outline without trapping folds.
Contrasting underbrims require clear identification. The approved colour combination should remain consistent through preparation, stitching and attachment to the crown.
Keep Stitch Rows Even and Appropriate
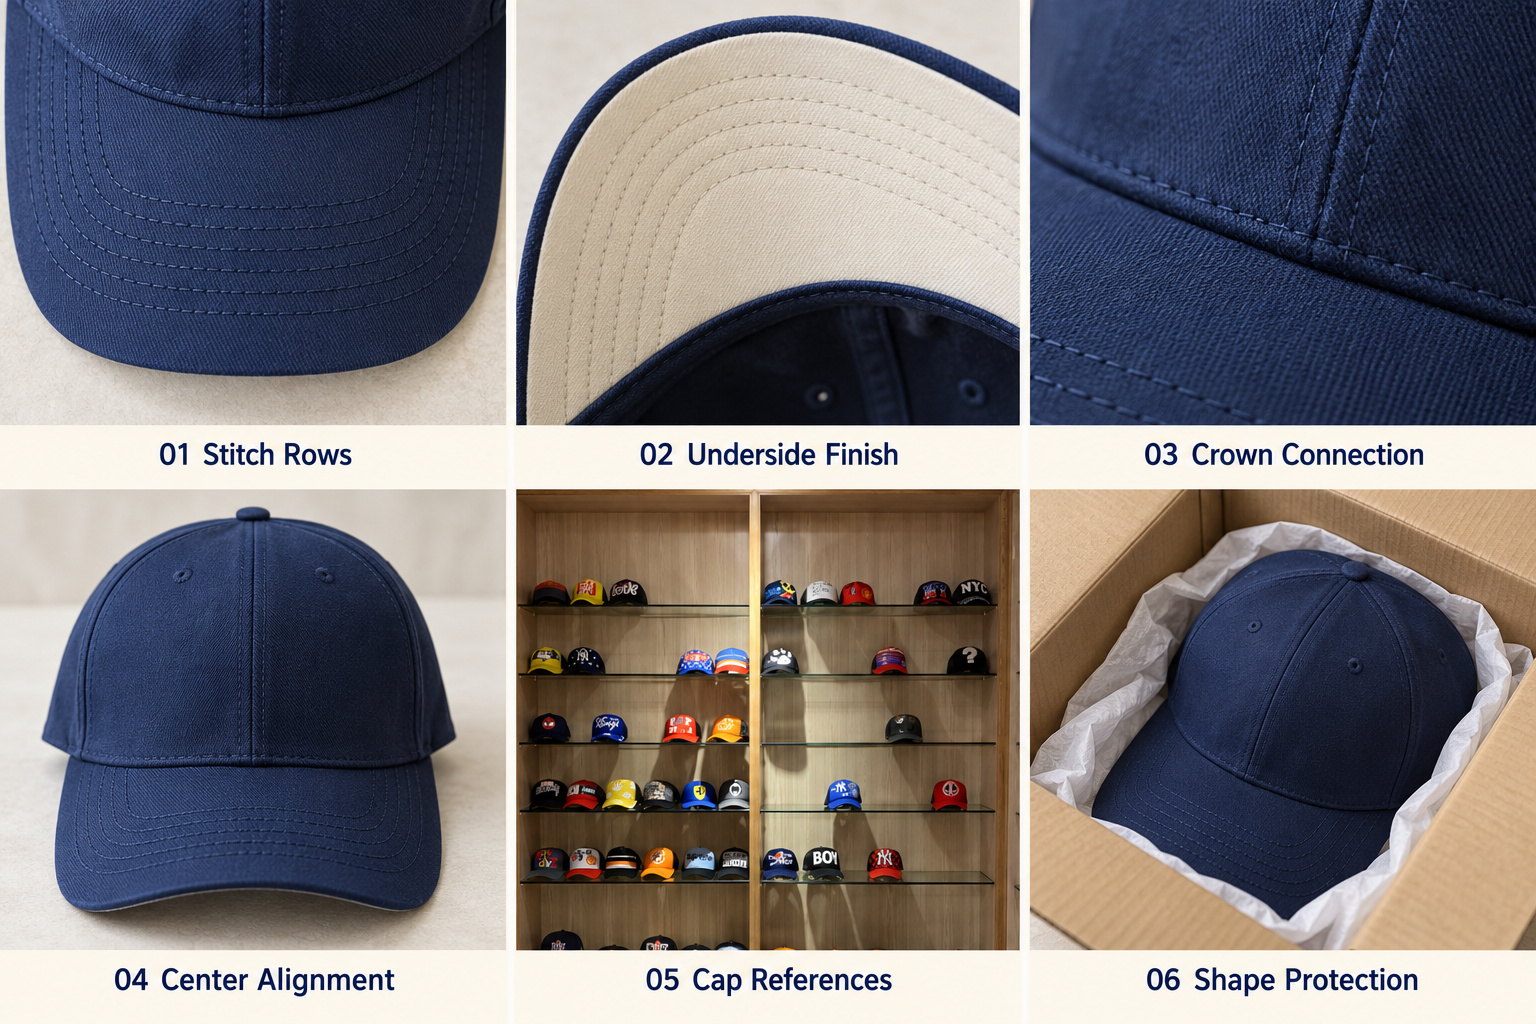
Where stitch rows are specified, their number, spacing and thread colour should follow the sample. Contrasting thread makes irregularities more visible, particularly around the curved front edge.
Stitch settings need to suit the combined fabric and insert. Uneven feeding or excessive tension can distort the cover, while unsuitable settings may leave loose stitches or visible needle damage.
Checks should examine the top and underside. A tidy upper surface does not confirm that the lower thread is balanced or that the underside fabric remains smooth.
Align the Brim with the Crown
The prepared brim must meet the crown at the agreed centre position and attachment line. Uneven alignment can make the cap look tilted or place the brim incorrectly beneath the front decoration.
The joining edge also needs to match the assembled crown without forcing either component into place. Excess fabric or inconsistent seam allowance can introduce puckering at the connection.
The reference from crown assembly should be checked alongside the brim. Final balance is assessed on the complete sample after the relevant attachment and finishing operations.
 Review the Sample and Protect the Finished Brim
Sample review should cover outline, curvature, firmness, stitch appearance and the crown connection. Record revisions clearly so the production reference reflects the accepted version.
Checks during quality inspection should compare these details with the agreed sample. Packing should avoid sharp folds, excessive compression or arrangements that alter the approved curve.
Send the cap reference, brim dimensions, fabric colours, stitch preference and order quantity for review. Insert availability, additional stitching and sample revisions can affect cost and timing. Packaging requirements and the delivery destination should also be shared before the production and shipment schedule is confirmed.