


Develop Your Logo for the Selected Cap
Capzorva Baseball Cap coordinates logo and embroidery development for apparel brands, importers, wholesalers and promotional buyers through cooperating production partners. We review your artwork against the cap fabric, crown construction and intended placement before confirming a suitable production route.
Send the original artwork, preferred dimensions, colors and a placement reference. Identify whether the design belongs on the front, side or back. A logo that works on a flat drawing may need adjustment when applied to a curved crown or across a panel seam.
Choose Flat or 3D Puff Embroidery
Flat embroidery produces a stitched design close to the fabric surface and can suit lettering, outlines and filled areas, depending on their size and complexity. Fine text still needs enough space for stitches to remain distinguishable.
3D puff embroidery creates raised sections using a supporting foam beneath the stitches. It generally suits simpler, broader shapes better than intricate artwork. Raised and flat areas can be reviewed together where the design allows. We assess the proposed effect on the selected material rather than assuming every logo can use either method without changes.
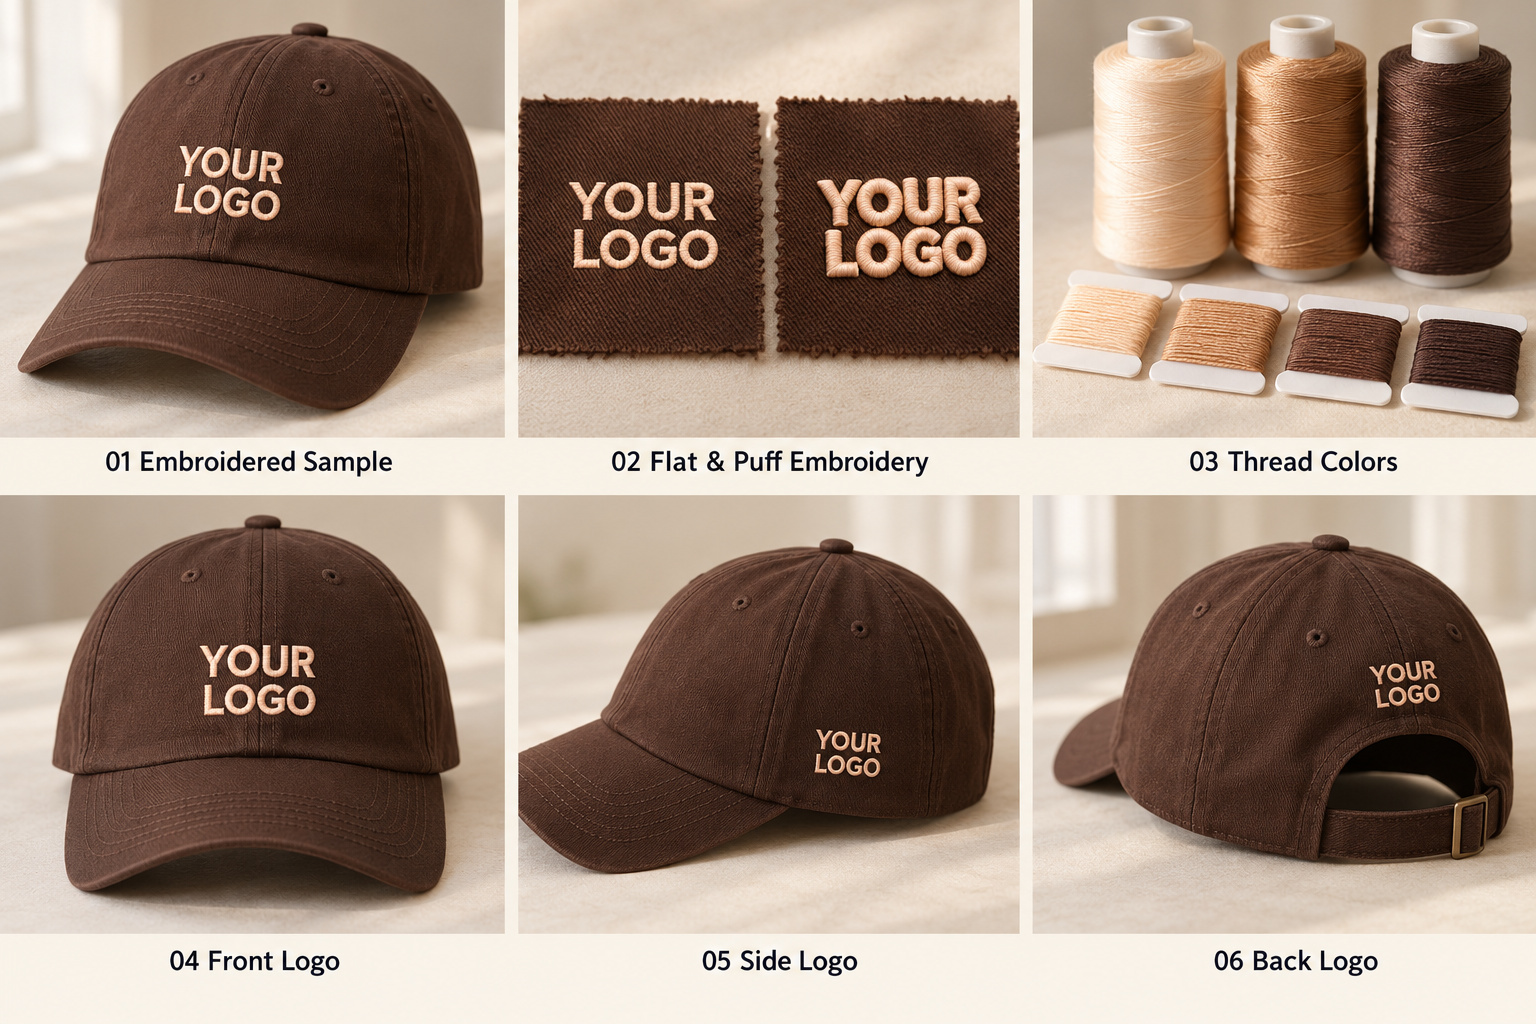 Confirm Artwork, Colors and Placement
Vector artwork provides a clear starting point, but it still needs preparation for embroidery. Small lettering, narrow gaps, fine outlines and closely packed elements may require simplification. We discuss proposed changes before sampling so the approved result remains recognizable.
Specify finished logo width and height, together with its position relative to a defined seam or edge. For a six-panel front, the center seam can affect stitch appearance. Available space also changes with crown height and support, as explained in our cap structure and brim options.
Thread colors should be reviewed using physical references where shade accuracy matters. Fabric and thread can appear different under the same lighting because their surfaces reflect light differently.
Approve a Stitched Proof and Complete Cap
A stitched proof helps establish lettering, thread shades, coverage and the proposed raised effect. It should use representative fabric and backing. Where the production route uses embroidery on flat panels before assembly, the finished cap also needs review for shape and placement.
Check for puckering, distorted letters, loose threads and uncomfortable backing where relevant. A close-up photograph documents detail, while a complete sample shows the overall result. Record the approved artwork version and comments through our cap sample development process.
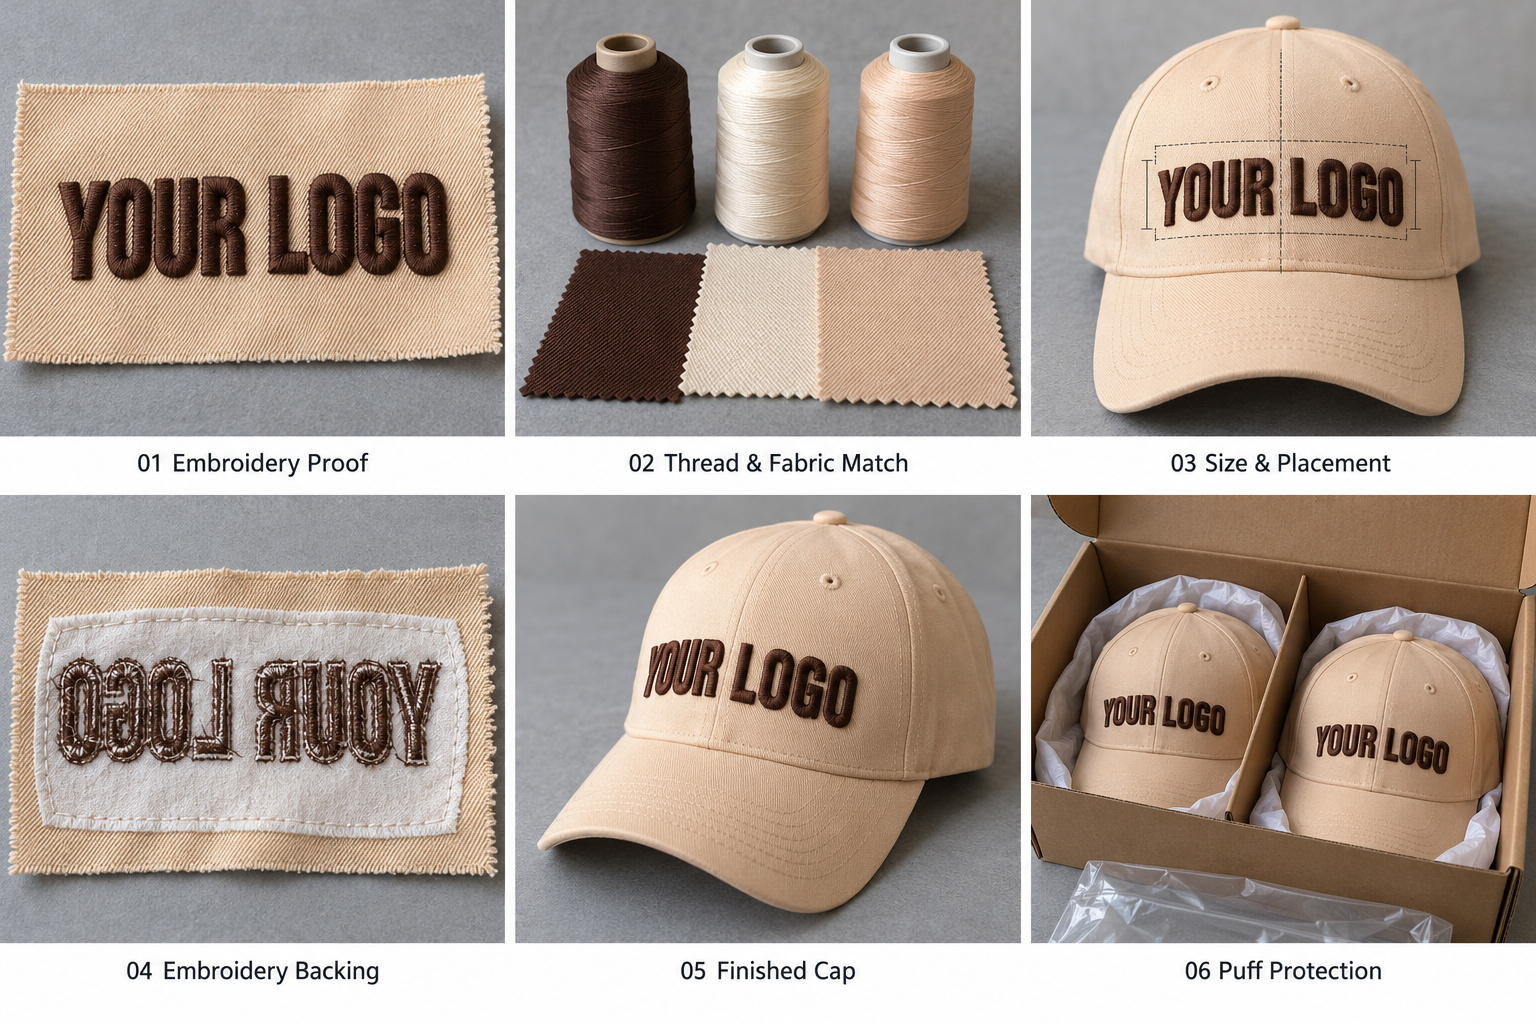 Review Setup Costs, MOQ and Timing
Logo size, stitch coverage, thread changes, decoration positions and artwork preparation affect pricing. Separate logo versions may require additional setup even when the cap style remains unchanged. State quantities per design and color when requesting a quotation.
Sample charges, setup costs and production timing are confirmed after review. Artwork revisions or a change from flat to raised embroidery can require another proof. Bulk work should follow the approved design, materials and placement reference.
Check Embroidery and Protect the Finished Design
Agreed production checks should compare logo dimensions, position, thread shades, stitch definition and visible fabric distortion against the approved reference. Inspection scope and any third-party involvement are arranged separately through our quality inspection review.
Packing should avoid sustained pressure on raised embroidery and prevent hardware from rubbing against decorated areas. Send your artwork, cap reference, logo dimensions, quantity breakdown and destination so we can review feasibility and prepare the applicable sample and quotation terms.